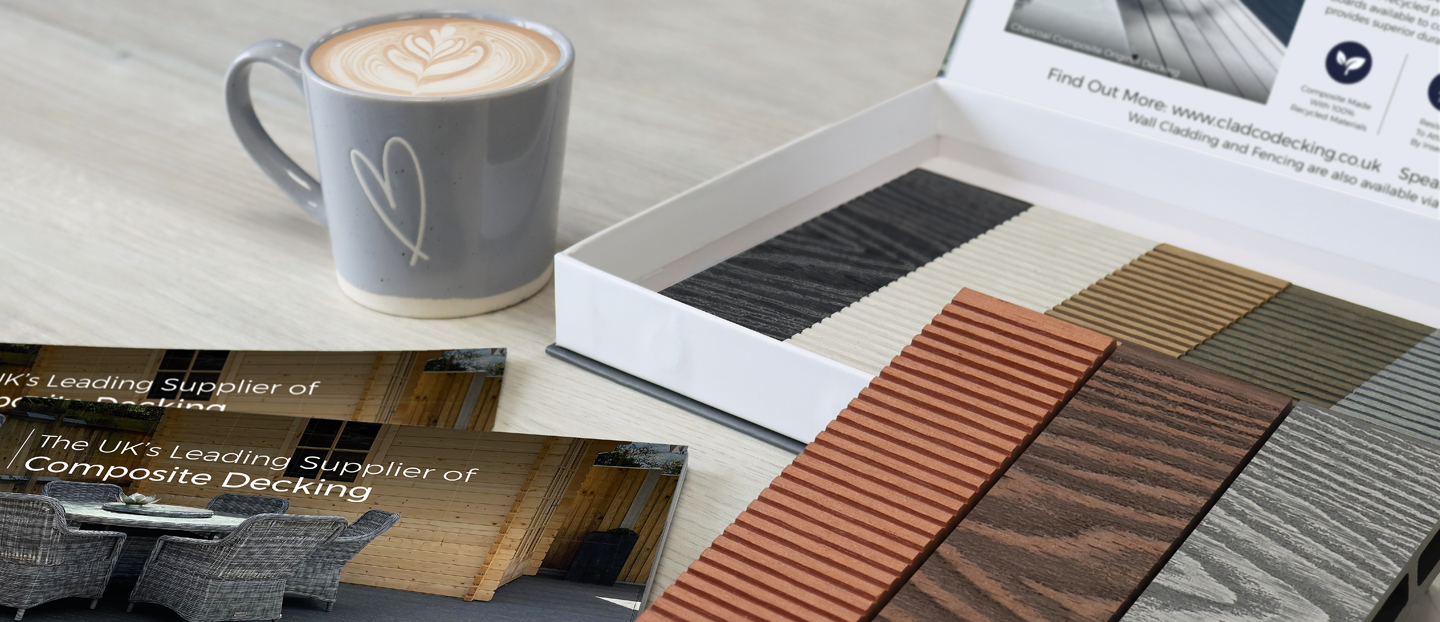
Cladco ProDeck & VersaDeck Decking Installation Guide
Installation Guide, Aftercare, and FAQs
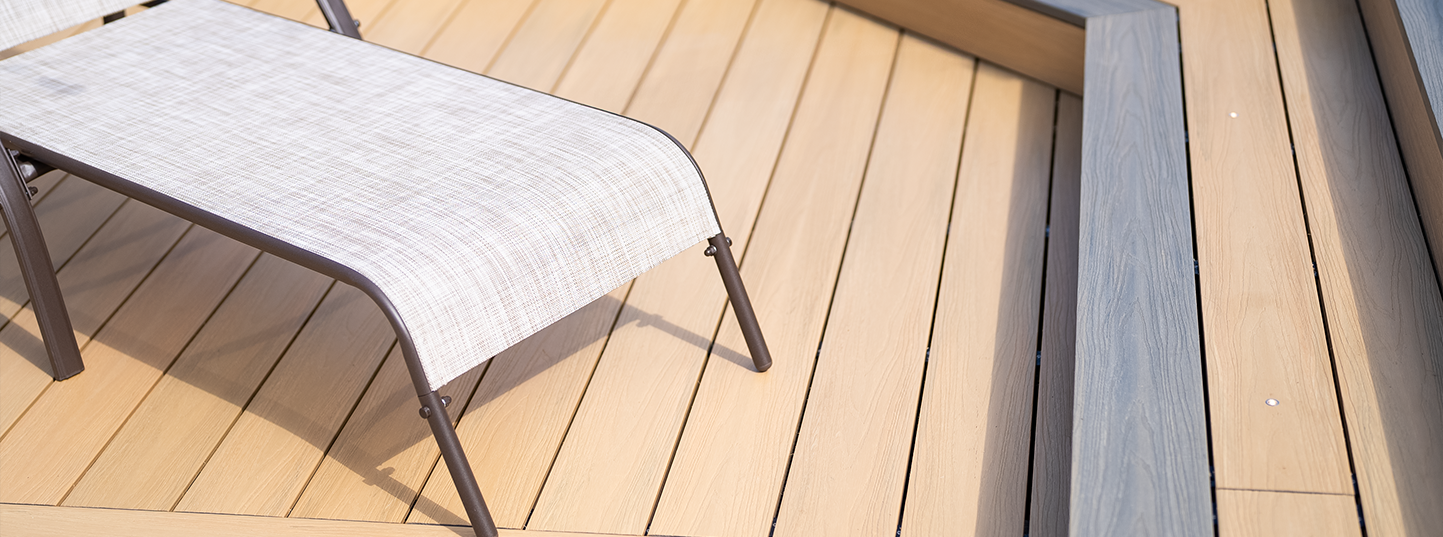

Storage, Colour Variation, and Warranty


STORAGE AND HANDLING
Cladco ProDeck or VersaDeck composite decking boards should always be stored in a cool and dry place that is out of direct sunlight. They should be stored on a level surface that supports the entire length of the board - ensuring they do not warp or bend.
Protective gloves must be worn when handling and cutting boards, and care should be taken when lifting. We recommend a minimum of two persons carry the boards, always ensuring it is within their physical capabilities. It is recommended that when cutting the boards that they are placed on a timber surface to prevent scuffing.


COLOUR AND GRAIN
Cladco ProDeck and VersaDeck decking boards are manufactured from capped composite materials and are designed to replicate the natural variations of a timber decking board.
ProDeck boards feature a woodgrain effect or narrow groove effect top layer whilst VersaDeck feature a woodgrain effect on either side. It is, however, still recommended that you purchase all capped composite boards required for the same project together at the same time, as this will ensure there is colour consistency throughout, whilst saving any additional delivery costs.
We advise that all boards are laid out prior to installation to ensure a natural, well-balanced tone throughout. As with all materials exposed to direct sunlight, some natural weathering may occur over time. Boards should be acclimatised to the same temperature and stored in the same environment prior to installation.


15 YEAR WARRANTY
Cladco capped composite decking is supplied with a 15-year residential warranty and a 10-year commercial warranty when installed onto recycled plastic joists, subject to terms and conditions. Cladco ProDeck and VersaDeck decking boards should be installed as per this installation guide. Failure to do so may invalidate the warranty. For further information, please visit our terms and conditions.


BOARD TOLERANCE
Due to the natural composition of composite materials, a small tolerance of up to ±5mm is present in both the length and width of boards. This is completely normal and accounted for in our recommended installation practices.
Tools & Equipment

TOOL SET
Standard everyday carpentry tools will be needed to complete the installation, including: tape measure, pencil, spacing tools, and stanley knife.


POWER DRILL AND DRIVER
Standard power drills can be used when installing capped composite boards. A standard Phillips screwdriver bit PH2 should be used when working with Speeddekz screws.


CLADCO ADHESIVE
We recommend using Cladco adhesive to secure prodeck trims when concealing a support system beneath. When using the adhesive, do not allow the adhesive to get on the decking boards, as this can damage the finish of the deck.


JIGSAW OR HANDSAW
Capped composite boards can be cut using any standard wood cutting tools. We recommend using a fine-toothed blade to get the cleanest finish to your cut edge.

SPIRIT LEVEL AND STRING
A spirit level is essential when installing your decking to ensure a level support system. A spirit level ensures that capped composite boards are installed along a straight edge. A slight slope should be included to allow for water run-off.
Prepare Your Base
Choose from two bases:
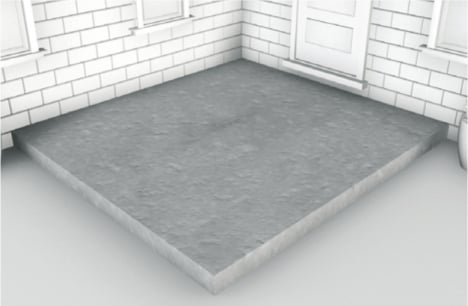

CONCRETE BASE
A 100mm thick concrete base is recommended, with a slight slope for drainage to occur. The optimum slope should be around 5mm for every metre.
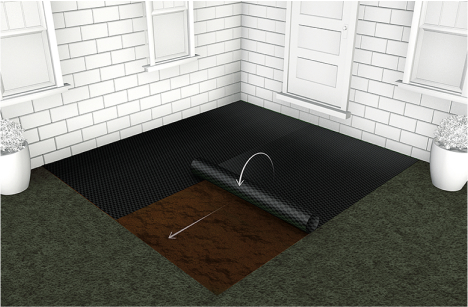

GRASS OR SOIL BASE
Remove the turf or soil until the ground is completely even, ensuring to remove any debris or rocks from the area. Cover the area of your site with a layer of weed mat to prevent any weed regrowth coming up under your decking.
If you need to overlap the weed mat, ensure you do this with enough fabric to prevent any gaps. Once cut and pinned into place, cover the weed mat with your desired coverage, such as chippings, bark or stones, so that none of the material is exposed.
AIRFLOW
Ensure your substructure design allows for significant airflow and ventilation. If the decking is being installed in areas with poor ventilation, it must be installed on top of a substructure that allows for an airflow gap of 30mm for composite joists and 50mm for both structural composite joists and recycled plastic joists.

Recycled Plastic Framework


BEFORE YOU BEGIN
The below installation guideline is using Cladco recycled plastic decking Joists. Please Note: this can also be achieved with composite joists.
For wall-to-wall decking installations, please follow the below instructions. For Decking installations with exposed edges, it is recommended to use bullnose boards. Please refer to the bullnose board installation section further down the page.
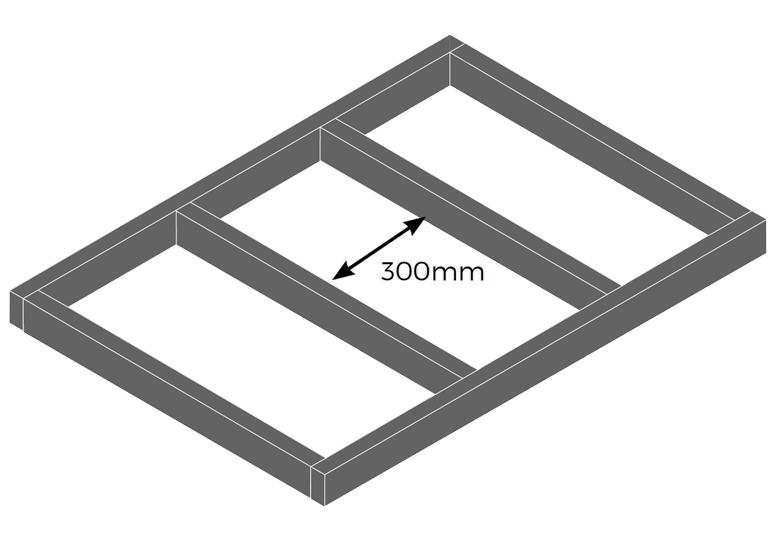

1
The maximum recommended space between recycled plastic joist rows depends on the angle at which you intend to lay your boards about the joists, but should never exceed 300mm, please see the diagram. If using timber joists, apply deck tape to the top surface and exposed cut ends to protect them from moisture and prevent rotting.
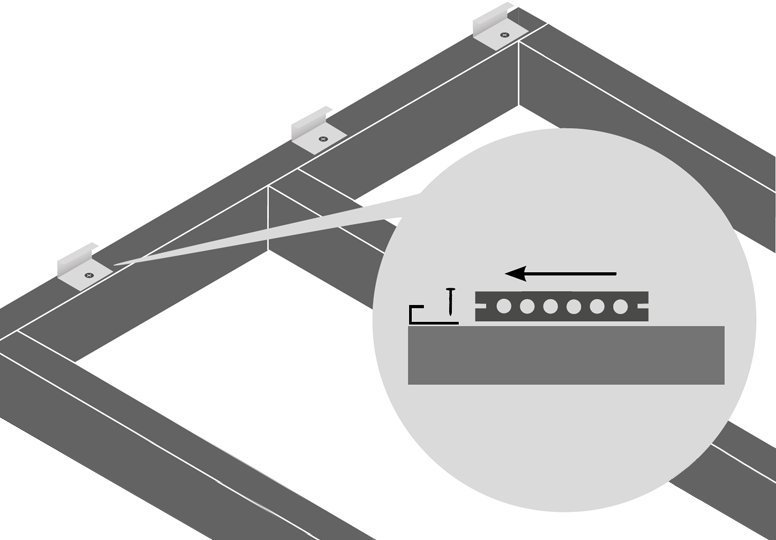

2
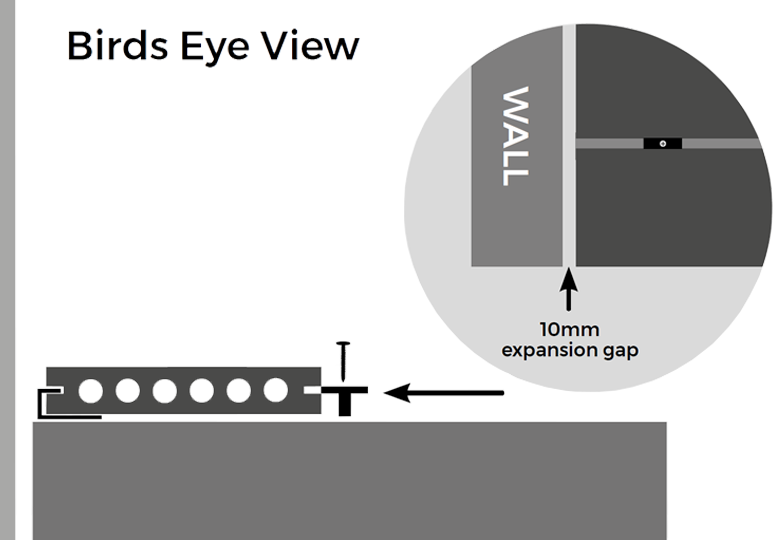
Capped composite bullnose/starter clips need to be fixed to the end of the joists before laying the first board, leaving a gap of at least 10mm between any walls and the starter clip. Use one bullnose/starter clip and screw per joist. Place the first capped composite board on the frame, ensuring the boards run perpendicular to the joists and secure the first board into the first bullnose/starter clips. Do not screw through the capped composite board.

3
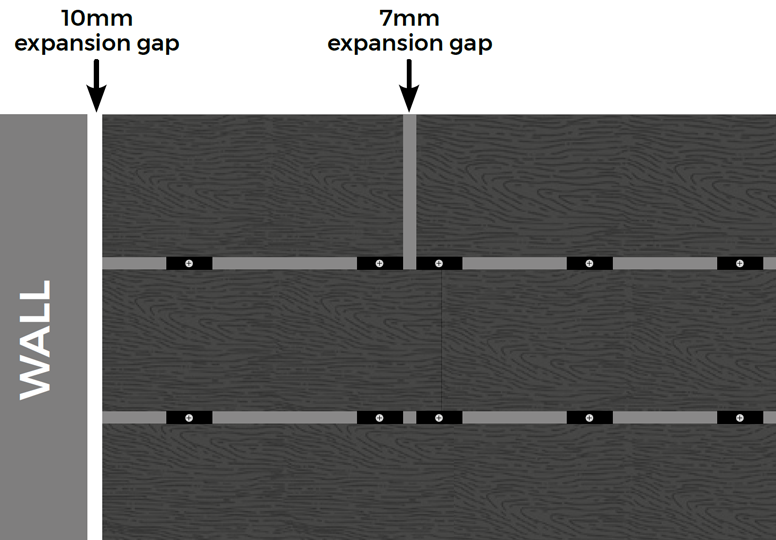
Take a t-clip and slot it into the groove along the first board you have just secured. Place a screw through the hole of the t-clip. Screw down and into the joists below but do not tighten at this point. Continue to fix t-clips in place along the groove of the board, screwing one t-clip into each joist. Ensure the capped composite boards do not overhang the joist at the edge by more than 25mm and leave a 10mm expansion gap between the wall or any other fixed objects that may surround the decking.
WANT A SMALLER GAP BETWEEN YOUR BOARDS?
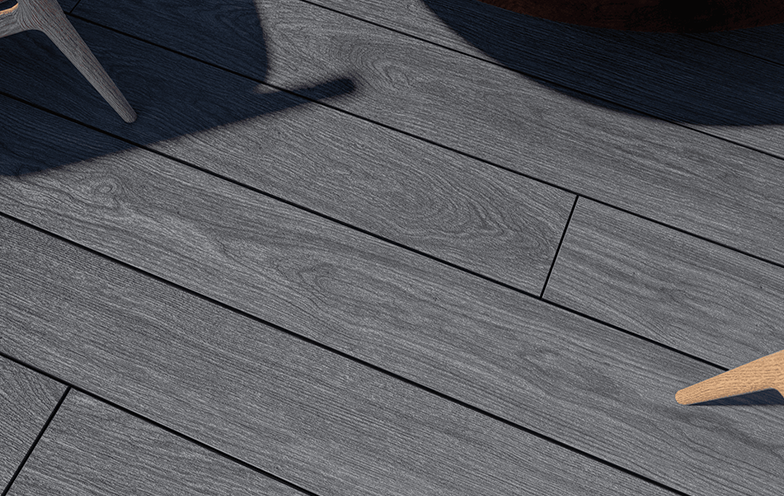
We offer a hidden clip with screws that allows the spacing between the board to be 3mm. This is a great option for securing your decking boards discreetly and aesthetically while streamlining your installation.


4
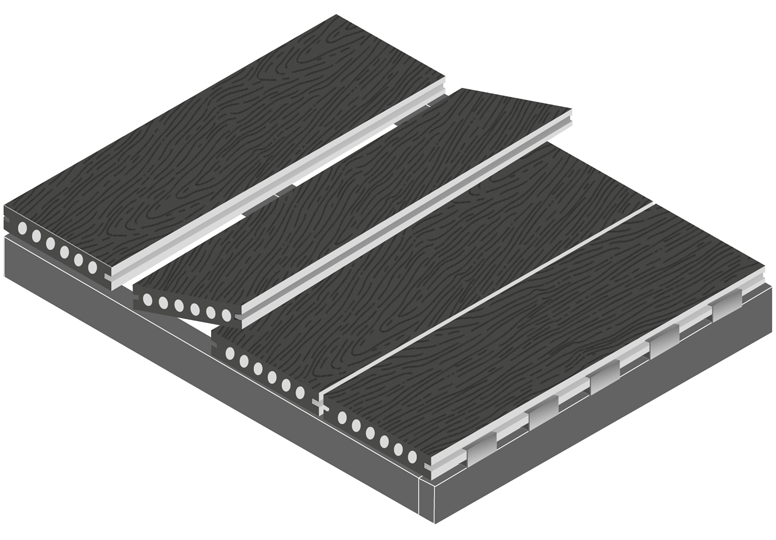
Take the next capped composite board and slot the adjoining t-clips from the first board into the groove of the second board and secure them next to each other. Repeat steps 3 and 4 to cover the entire decking area, using one t-clip and one screw per joist. We recommend alternating the direction of the woodgrain surface on every other board for a more natural, varied finish
Please Note: Do not allow capped composite boards to meet at the ends. T-clips will leave a 7mm expansion gap between each board to allow for expansion and contraction in temperature changes. It is not recommended that boards are installed in temperatures below 5°C.

5
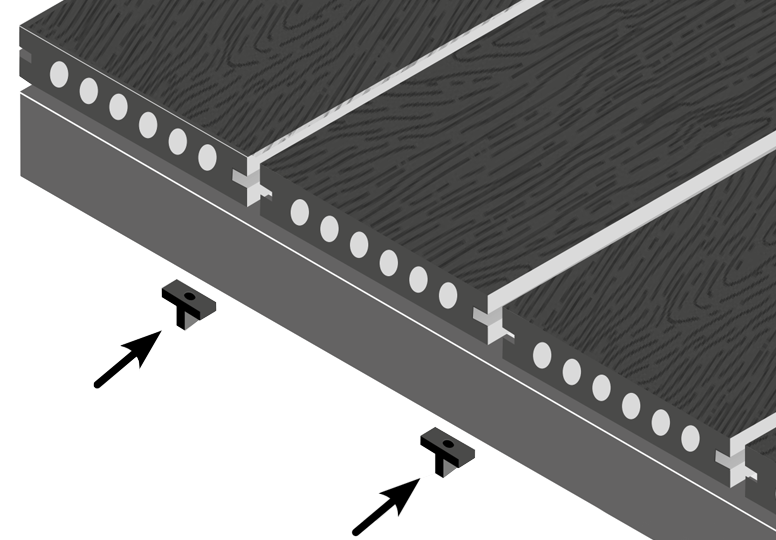
For the final two boards, measure the width of both boards together (including the 7mm expansion gap) to discover where the outer edge of the final board will lie and mark out with a pencil on the below joists. Use this mark to fit the final bullnose/starter clips and slot the last board into place using these clips.

6
Slide the required amount of t-clips through the final board groove, aligning with the joists, before the penultimate board is inserted and screwed into place with the t-clips.
TOP TIP
If using capped composite fascia boards, pre-drill pilot holes with a counterbore through the fascia at 200-300mm intervals, and allow for an expansion gap between the end of the decking board and the fascia board of 5-7mm. Screw the fascia board to the joist at a 90-degree angle.

Finishing Your Decking
LOOKING FOR A SMART WAY TO CONCEAL YOUR DECKING EDGES?
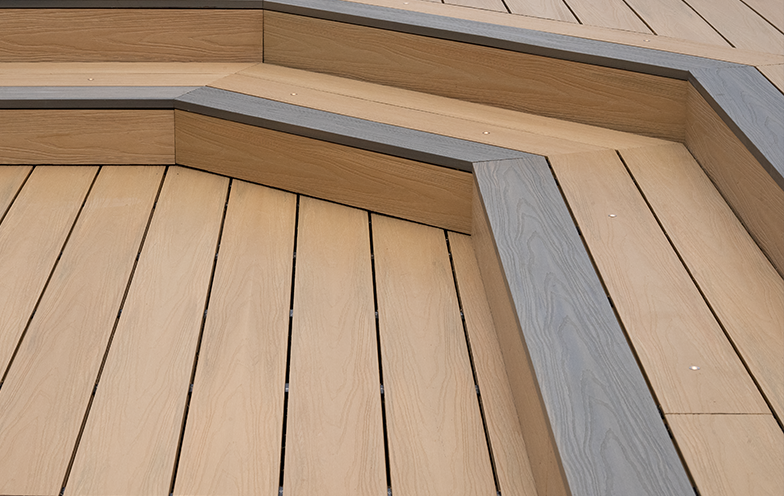
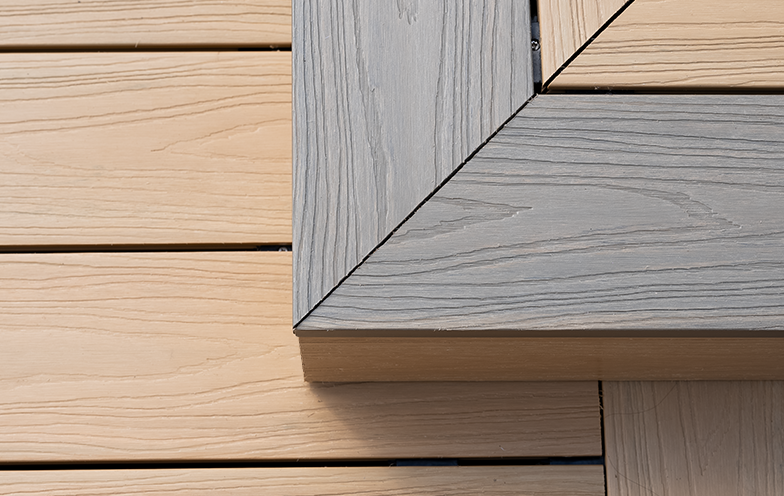
If you are installing decking that is not surrounded by walls and will have exposed edges, it is recommended that you begin your installation with our capped composite bullnose boards. These boards have a groove-less outer edge and will conceal the ends of the six-hole capped composite boards.

For an Overhanging Finish

1
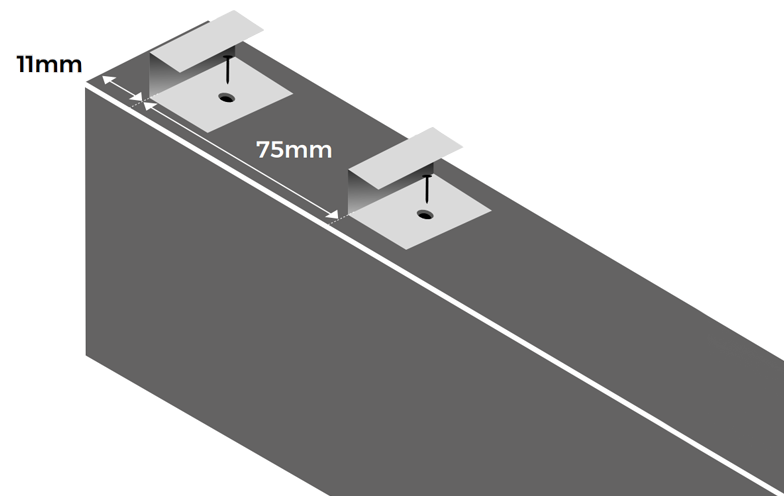
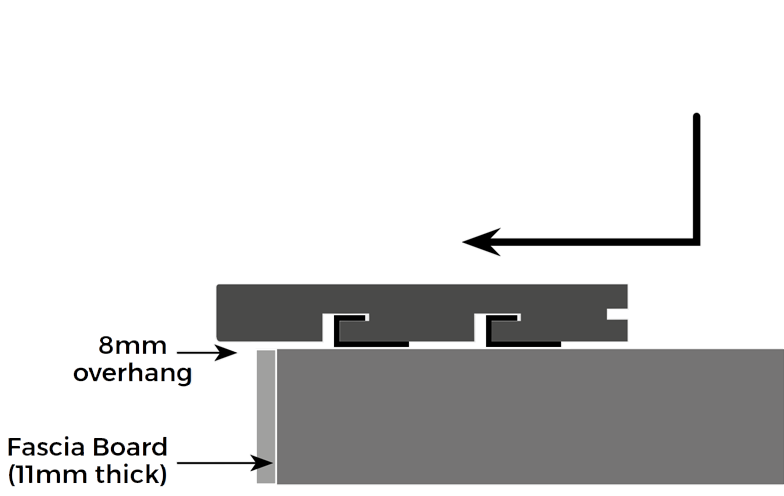
Using the same frame substructure, fit two starter/bullnose clips to the end of your joists as shown here, ensuring they are spaced 75mm apart with the first clip being 11mm from the edge joist.

2
Fit the capped composite bullnose board over the starter/bullnose clips and push forward until flush. Secure in place with t-clips as required before continuing to fit the rest of your standard capped composite decking boards.
For a Flush Finish

1
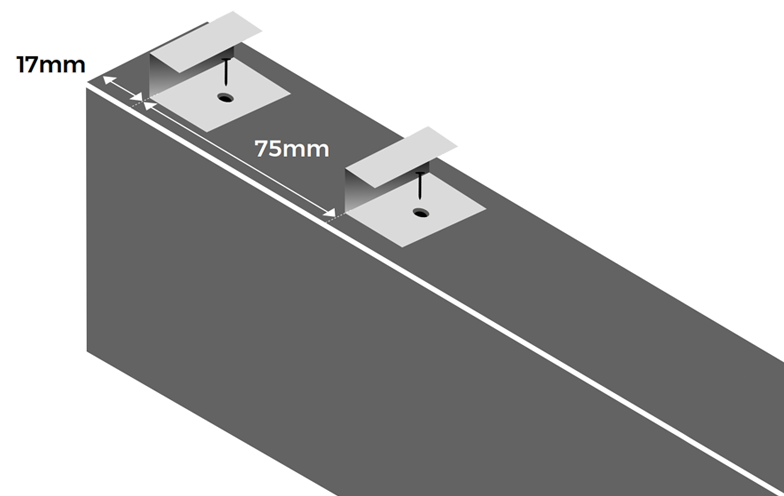
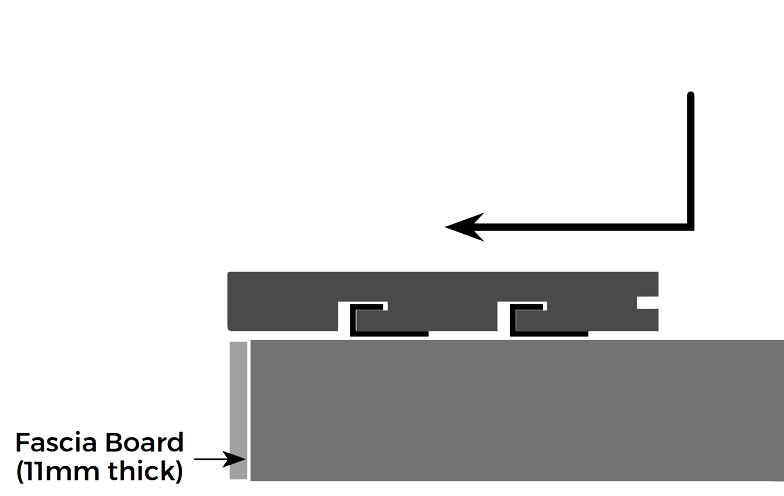
Using the same substructure, fit two starter/bullnose clips to the end of your joists as shown here, ensuring they are spaced 75mm apart with the first clip being 17mm from the edge of the joist.

2
Fit the capped composite bullnose board over the starter/bullnose clips and push forward until flush. Secure in place with t-clips as required before continuing to fit the rest of your standard capped composite decking boards.
For Installation With Steps
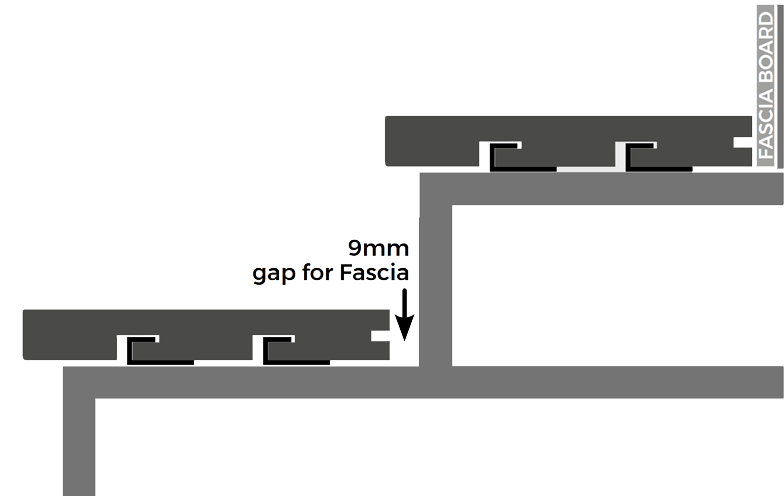

Install the capped composite bullnose boards as above on each step, leaving a small 9mm gap behind to allow the fascia board to fit. Fit the fascia boards on each step to conceal the decking underneath. Ensure you have planned and measured your steps in accordance with the capped composite bullnose and fascia boards dimensions to avoid any vacant space.
Tips on Using the Capped Composite T-Clip System
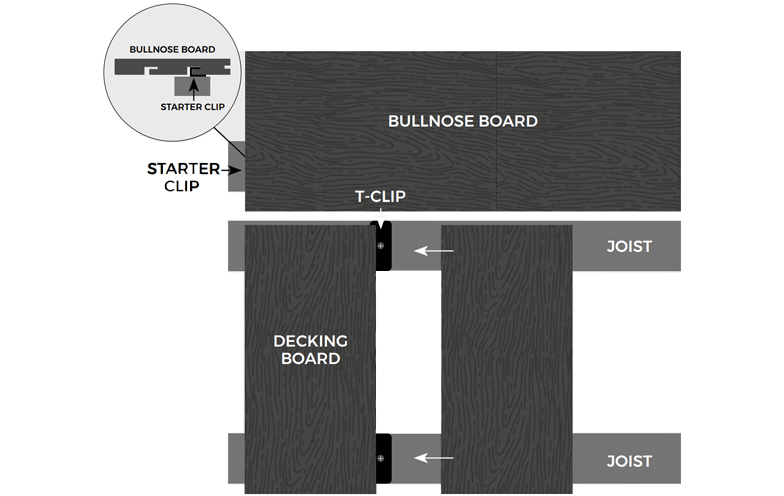

1
Insert the t-clip as shown in the diagram so the front of the clip is within the groove of the secured capped composite bullnose board.
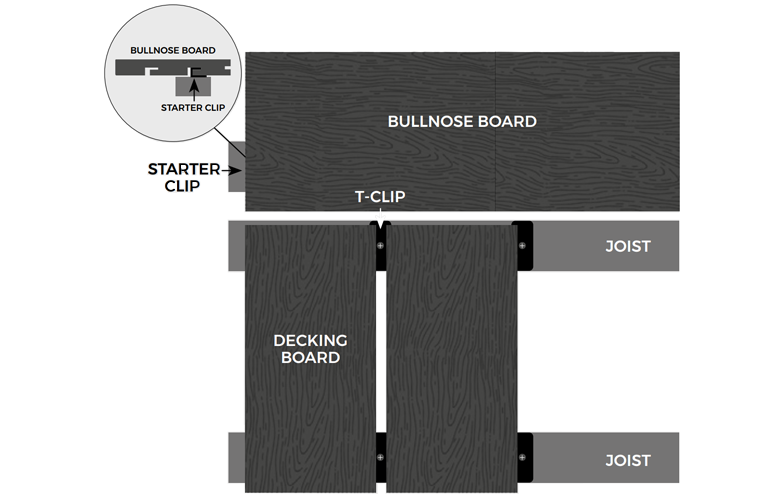

2
Screw the t-clip into the joist before pushing the next capped composite board firmly in place.
3
Repeat this for the remainder of the capped composite boards, ensuring that the front of all t-clips is firmly in the groove of the bullnose board.
Aftercare and Maintenance


SNOW AND ICE
Take care when walking over your decking in adverse weather conditions, such as snow or ice, as this may cause the decking to become slippery.
If using de-icer, ensure that the product contains calcium chloride, as this will not damage the decking. It may leave a slight residue behind, but this can be easily cleaned away. Always check before using any chemicals on the decking.
Do not use grit, sand or metal/plastic spades on your decking as they may scratch the surface.


MAINTAINING YOUR DECKING
In some cases, pressure washing may be required for long term dirt. When using a pressure washer, it is recommended that a distance of at least 300mm is left between the decking and the pressure washer nozzle to avoid any damage.
For standard everyday debris such as, plants, leaves, berries and animal droppings, simply brush your decking free of any debris with a soft/ medium bristled broom.
Discolouration can be caused by chemicals found in everyday household products, such as suntan lotion, or insect repellent; take care when using these products near your capped composite decking.
During the first 6-12 months after installation, the colour of the decking boards will stabilise. During this time, capped composite boards may fade naturally from weathering before stabilising to a final colour.


FIRE AND HEAT SOURCES
Precautions should be taken when using fire pits and BBQs near capped composite decking. Caution should be taken with embers coming into contact with the decking. Cladco cannot be held responsible for any fire damage or flames that come into contact with the decking. To use a heat source near the decking is entirely at the risk of the customer.


MOULD AND MILDEW
Mould and mildew are common in outdoor environments. The climate will affect how mould grows, dependent on temperature and moisture levels. To minimise mould growth on your decking, ensure it is cleaned often. If mould is present, use hot, soapy water to remove. In cases of more stubborn dirt or grime, pressure washing may be necessary to restore the decking's appearance.

1
Use a brush to remove any debris, such as leaves, off the decking to create a clear surface ready for cleaning.

2
Prepare a bucket of hot soapy water. You may want to wear rubber gloves.
3
Apply the hot soapy water to your decking. Once applied use a brush to scrub the surface of the decking. Any surface debris will start to lift off.

4
Leave the hot soapy water on the surface for several minutes before rinsing. Ensure all soap and debris have been successfully removed from the boards before leaving to dry.
FAQs
Where can I install my capped composite decking?
Cladco capped composite decking is very practical for any outdoor space (subject to building control and a structural framework). Cladco capped composite decking can be installed on grass, soil or concrete providing it has a suitable sub structure to be built upon.
Can I use a pressure washer?
A pressure washer can be used to clean your decking area. We recommend using a pressure washer with a psi of no greater than 2000.
A fan tip should be used with a 40 to 60 degree spread, keeping the head 250-300mm away from the surface. Please note that using pressure washers may increase the chance of screw holes becoming more visible. Always test in an inconspicuous area first. Direct, prolonged contact could damage the surface of the boards and should be avoided.
Will my decking get hot in the sun?
As with all products exposed to the sun, capped composite boards can become hot over prolonged periods. Darker colours can feel hotter in areas exposed to direct sunlight, footwear may be necessary in these circumstances. Special caution should be taken when using decking in areas with prolonged sun exposure and next to glass.
Can I use a fire/bowl or patio heater on my decking
When using a fire pit or patio heater, it is always recommended to test this with an offcut of board first. Any embers or heat that come into contact with the boards should be removed immediately. Embers or heat may damage the integrity of the board and cause marks to the surface.
Are the capped composite bullnose and fascia boards also dual-sided?
No. The capped composite bullnose and fascia boards are all individual colours and are not reversible.
How much does decking weigh?
The 2.4m capped composite boards weighs approximately 7.37kg. The 4m capped composite board weighs approximately 12.28kg.
What colours are available?
Capped composite decking is available in seven stunning colours: Rosewood, burnt oak, sandstone, platinum, onyx, pewter, and quartz* (*available for ProDeck only.)


