Cladco Bamboo Decking Installation Guide
Installation Guide, Aftercare and FAQS

Storage, Handling and Health & Safety


Storage and Handling
Cladco bamboo decking boards must be stored in a cool, shaded and dry spot before installation. To ensure the boards are not sitting directly on a wet or cold ground, it is recommended that you place them on top of a pallet. Ensure boards are stored properly until they are ready to acclimate before installation.
When handling the boards, wear protective gloves and be cautious when lifting them. We recommend that a minimum of two physically capable persons carry the boards. Always ensure that any persons assisting with installation or handling are physically capable.


COLOUR
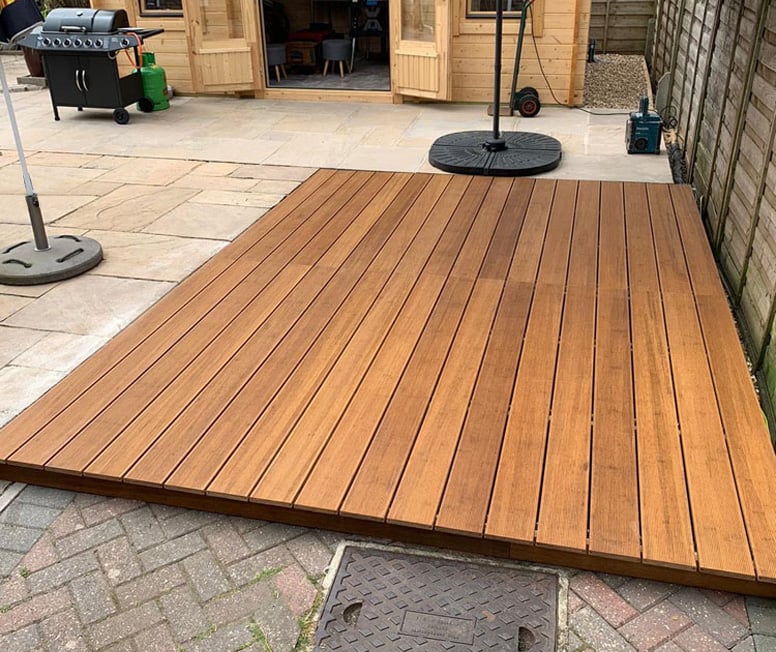
Cladco bamboo decking boards are made from compressed bamboo lengths, which create a natural wood finish with unique grains and colours running through. The dominant colour of the board is a rich, oiled brown, which is perfect for blending into natural environments. The board has one grooved side and one flat side.


10 YEAR WARRANTY
Cladco bamboo hardwood decking is supplied with a 10-year warranty, which is subject to our terms and conditions. Our bamboo decking boards must be installed following the installation guide, using our fixing clips. Failure to follow the installation process may invalidate your warranty. For more information, see our terms and conditions.
*Bamboo decking boards are covered by a Cladco Supplier Warranty provided by the supplier of the product. Please contact our Sales Team for further information.
Tools and Equipment


Protective Equipment
We recommend wearing a long-sleeved top and gloves when carrying or handling your bamboo decking boards. We also advise wearing ear defenders, a dust mask and safety goggles when you are cutting your boards, and when fitting your decking, wear knee pads.

Tool Set
Standard carpentry tools are required to install your decking boards, including a pencil, tape measure, Stanley knife and spacing tools.


Power Drill Or Driver
When installing your bamboo boards, you can use a standard power drill. When using SPEEDDEKZ 65mm woodscrews or SPEEDDEKZ 50mm screws, a standard Phillips screwdriver bit PH2 x 50mm is advised.


Electric Saw
Bamboo decking boards should be cut with an electric saw, due to their density.

Spirit Level And String
When you are installing your decking boards, a spirit level is required to produce a level supporting system, and the decking boards are running along a straight line. A minor slope allows for water to run off.
Prepare Your Base
Choose From Two Bases
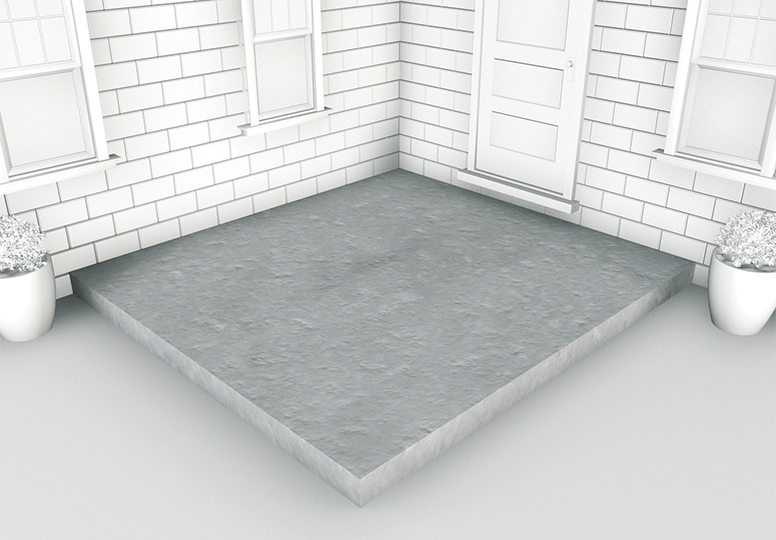

Concrete Base
We recommend a slightly sloping base of concrete at 100mm thick, to allow for drainage. It is suggested to have a slope of around 5mm to every metre.
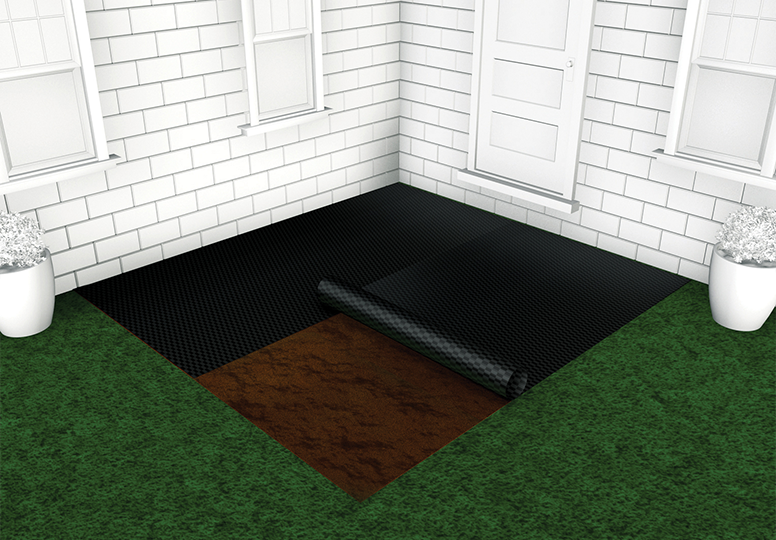

GRASS OR SOIL BASE
Level the ground by removing soil or turf, ensuring you clear away all debris and rocks. Once the area is even, lay the weed mat to help prevent regrowth beneath the decking.
If you need to overlap your weed mat, make sure you use enough fabric to cover any gaps. Once cut to size and pinned into position, cover your weed mat using your preferred aggregate, such as stones, bark or chippings, ensuring no weed mat material is visible.
AIRFLOW
Always ensure your substructure design provides adequate airflow and ventilation. In poorly ventilated areas, decking must be installed on a substructure with a 30mm airflow gap for composite joists, and 50mm for both structural composite joists and recycled plastic joists.

Timber Framework
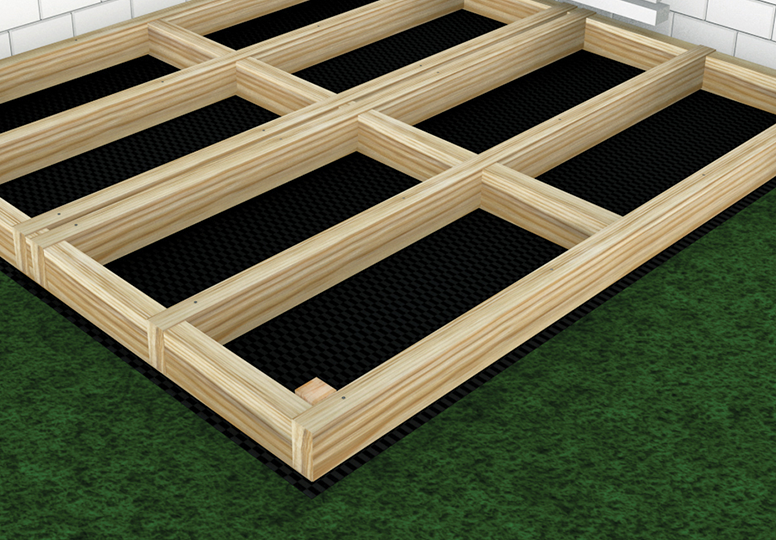

1
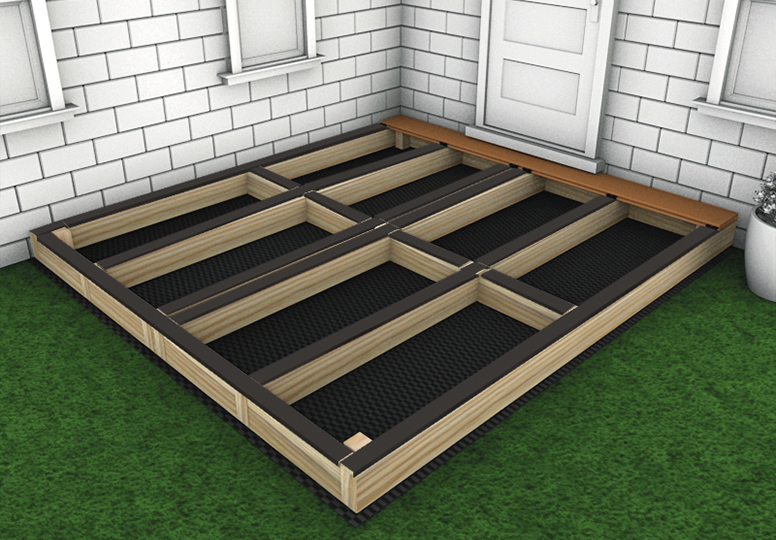
We recommend leaving a space of 450-500mm between rows of joists. Deck tape can be applied to protect timber joists from moisture at cut ends. For raised decking areas, ensure posts are placed at 1m intervals across the installation for adequate support.
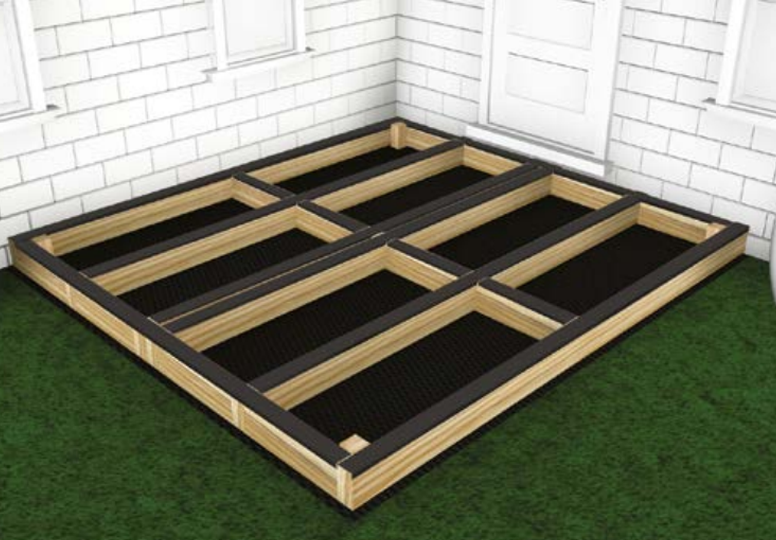

2
Fix starter clips to the joist ends, then lay the first decking board. Leave a slight gap between any walls and the starter clips in case of expansion.

3
Our bamboo boards are easily fastened to the joists of a supporting substructure with the help of our stainless steel screw and fixing clip system. Start at the outside of the area to be decked. Place your first board and fix it to each joist it crosses using a row of starter clips.
Laying The Decking Boards

CUTTING
If you are cutting your bamboo boards to size, we recommend oiling the cut ends and installing them immediately after doing so.

4
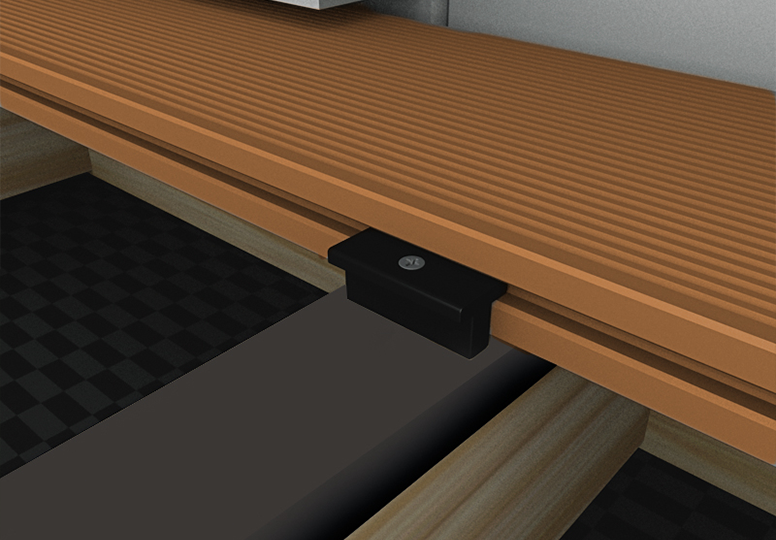
In the groove across the edge of the bamboo board, position fixing clips and screw into supporting joists using screws provided, for every supporting joist use one fixing clip. Our stainless steel wood screws are recommended for their durability and resistance to corrosion. A 6-7mm gap between decking boards is created by fixing clips.

5
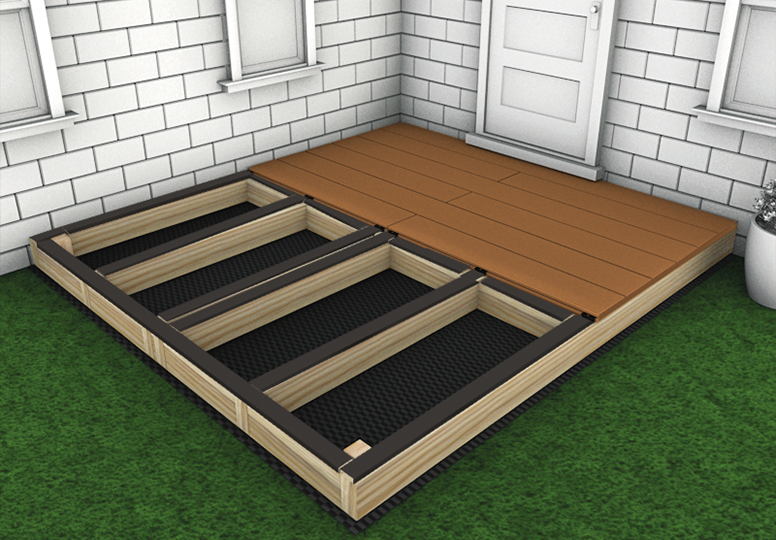
Slide the next board onto the secured fixing clips from the first installed board, fit a fixing clip set to fasten the alternate side of your board, a single fixing clip is to be used per supporting Joist. To fit the rest of the boards, proceed with a similar method. Make sure the decking board ends are fully supported. It is advised to have no cantilever or overhang.

6
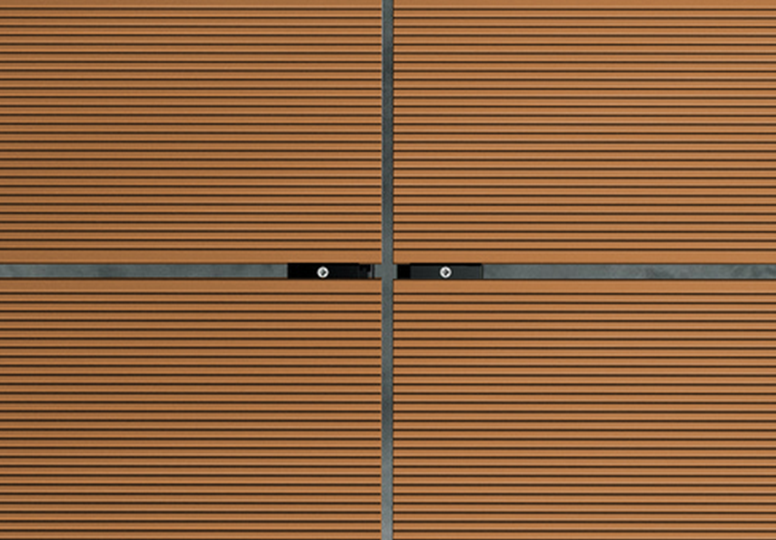
Where the ends of two bamboo boards meet, known as butt joints, a 2mm gap must be left between each board. At the meeting point, fixing clips should be used to hold both boards securely in place.
RAISED DECKING AREA
You can transform your decking area by installing a raised structure. Ensure posts are placed at 1m intervals across the installation for adequate support.

COMPOSITE FRAMEWORK

1
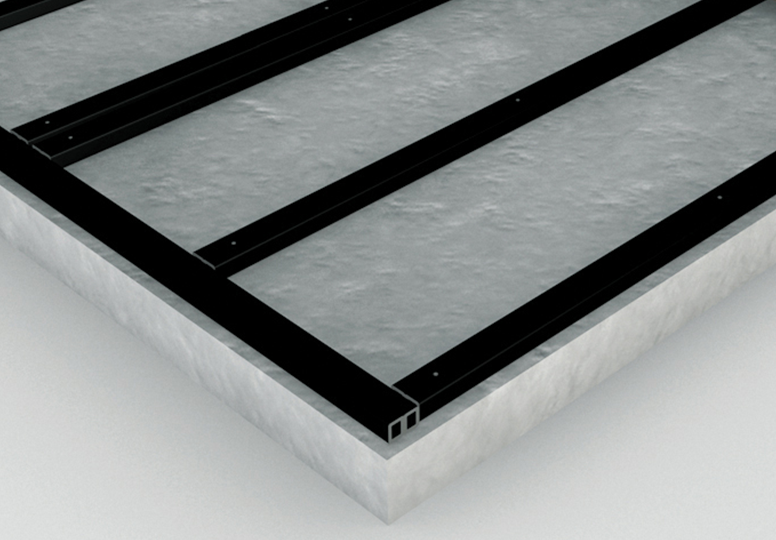
The boards should not be placed directly onto the ground, and need to be fixed to the joists. Between rows of joists, the recommended space is between 450mm and 500mm. Double joists are required where there are two decking boards that meet at the ends. Screw composite joists into your concrete base.

2
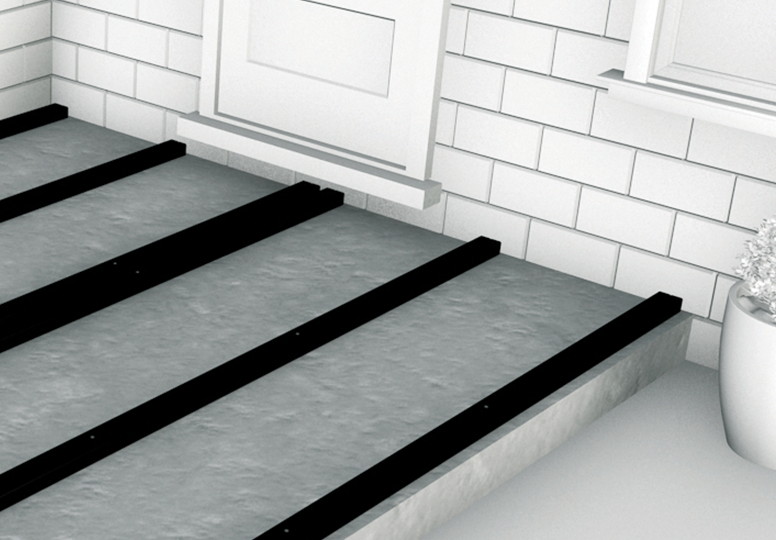
Before laying your first decking board, you must fix a starter clip onto the end of the composite joist. Starter clips need to be placed at every joist end where your bamboo boards will sit. You should also leave a slight gap between the joist end and any walls.

3
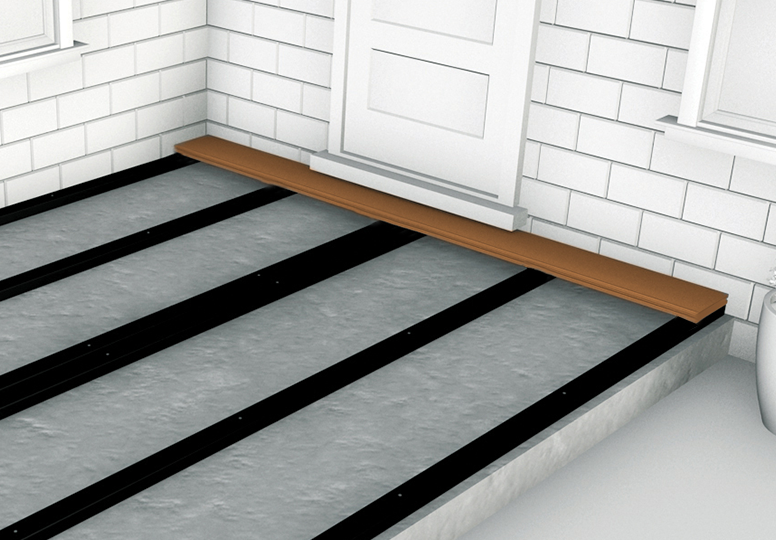
Our bamboo boards are fastened easily to supporting substructure joists using Cladco fixing clips and stainless steel screws. From the outer sides of your structure, lay your first bamboo board and, with a row of starter clips, fix it onto each joist that it crosses.
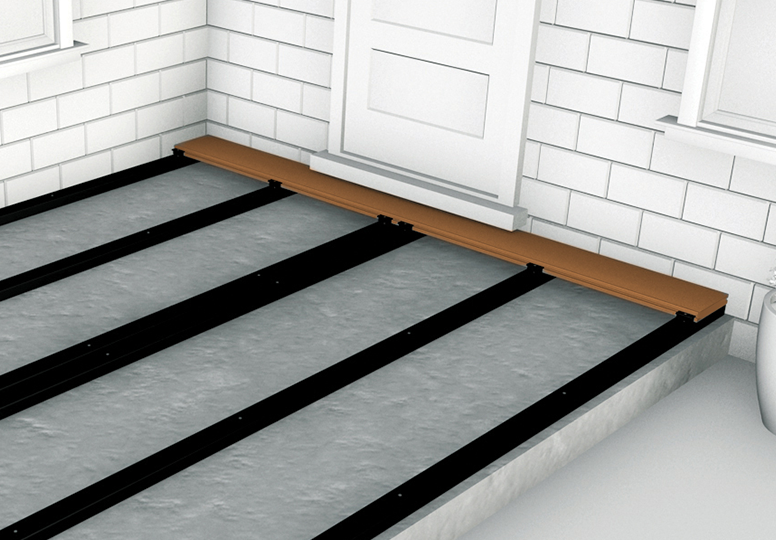

4
Fixing clips are then slotted into the grooves on the sides of each board and screwed into your supporting joists with screws provided. An individual fixing clip is used per joist. We suggest opting for our stainless steel wood screws due to their durability and reduced chance of corrosion. Between your bamboo decking boards, fixing clips will give a 6-7mm break between boards.
Laying The Decking Boards

EXTREME TEMPERATURES
Extreme temperature changes could cause the boards to expand or contract. Ensure boards have had sufficient time to acclimatise to the temperature before installing. Do not install in extreme temperatures.

CUTTING
If boards need to be cut to size, ensure the boards are installed and secured immediately after cutting.
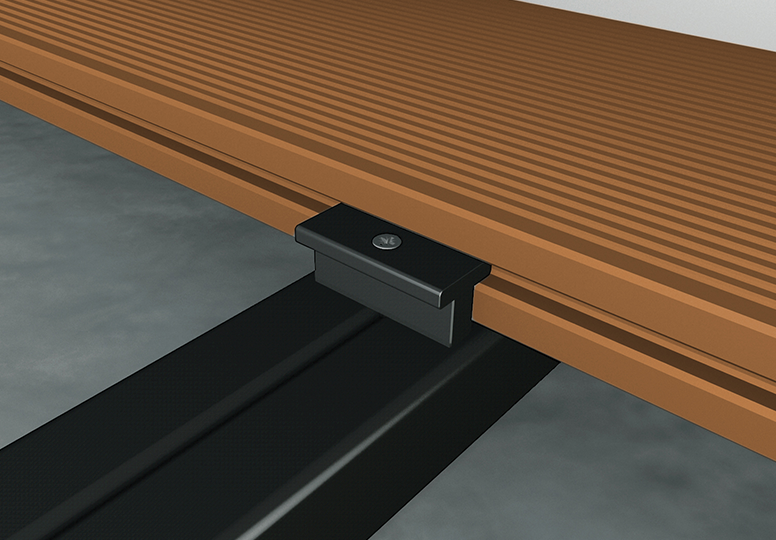

5
To install the next of your boards, slide it onto your fixing clips securing the first bamboo board and fit an additional fixing clip set which will secure the adverse side of your board, use a single fixing clip to every supporting joist. With similar steps, fix the remaining decking boards. Board ends must be adequately supported. It is recommended to not have an overhang or cantilever.
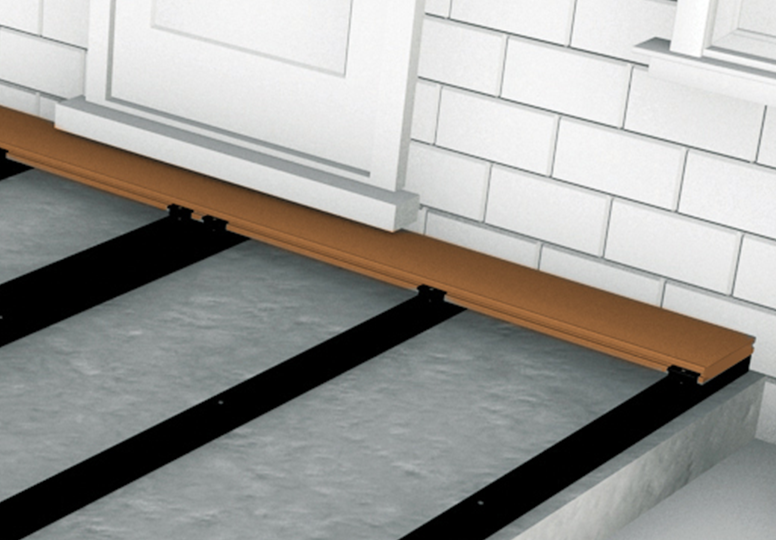

6
Each board should be held into place with a fixing clip where two board ends meet. Allow 2mm of spacing between butt joints.
Aftercare and Maintenance


SNOW AND ICE
In extreme weather conditions, such as snow or ice, take extra care when walking on your decking to reduce the risk of slips.
If using a de-icer, choose one containing calcium chloride to help prevent damage to the boards. This may leave a light residue on the surface, which can be quickly washed away.
Avoid using sand, grit, or shovels on the decking, as these can scratch or mark the surface.


MAINTAINING YOUR BAMBOO DECK
Cladco bamboo decking comes with a 10-year supplier’s warranty, reflecting the board’s exceptional strength and durability. To maintain its appearance and performance, some regular cleaning and upkeep are recommended to keep your decking area looking its best.
The first round of maintenance should be carried out immediately after installation. Thereafter, we recommend cleaning your bamboo decking every six months using water and a brush to remove any dirt or debris. Once the boards have dried naturally, apply an outdoor water-based oil to provide additional protection and preserve the decking’s appearance.
Chemicals in everyday household products can cause discolouration to your decking, so take caution when using products like insect repellent and suncream.
FAQs
Is bamboo decking a sustainable option?
Our bamboo decking boards are made from lengths of bamboo plants, which are fast-growing and need little maintenance to thrive. The plant also preserves its roots when it is harvested, so they will regrow independently. This is unlike other hardwood decking materials, which are not easily regrown, take decades to reach maturity and lead to deforestation. Due to these factors, our bamboo decking is a sustainable option, especially in comparison to other available wood materials.
How long will bamboo decking last?
Our bamboo decking boards are a robust, durable and solid material that will last a considerable amount of time. The superior strength of our bamboo boards means you will benefit from a 10-year supplier’s warranty when the boards are installed with our fixing clips per the installation guide.
What colour and finish is the decking?
Our bamboo decking features a rich, natural colour that has a subtle woodgrain running throughout the board. The reversible design comprises one grooved side and one smooth side. It is recommended to install your deck with the grooved side facing upwards to benefit from its anti-slip benefits.
How much does each board weigh?
We offer two lengths of bamboo decking boards, these are 2.4m and 3m. The 2.4m board has an approximate weight of 7.66kg, and the 3m board is approximately 9.58kg.


